Getting started
From a new board to a deck that Companion, the Elgato app or Home Assistant uses.
Four steps. Flash the board over USB-C in the browser. Plug in the deck and the network. Run the setup wizard. Connect Companion, the Elgato app or your own server.
- Flash. Connect the board's USB-C port to your computer and open the flasher. It can also join your Wi-Fi. Problems? See Flashing problems.
- Plug in. The deck goes into the USB-A port. Power the connector with a USB-C power supply, or with a network cable from a PoE port. The deck then shows its address.
- Set up. Open the address in a browser and follow the wizard. See First setup.
- Connect. Companion, the Elgato app or your own server. The source you pick in setup draws. You can switch at any time.
Using Home Assistant? It finds the connector by itself and gets every key press. It works next to Companion or the Elgato app. For Apple Home or Google Home, turn on Matter.
The deck menu
While a source draws, hold the first and the last dial for 2 seconds. On a deck without dials, hold the first and the last key. The menu closes after a minute without input.
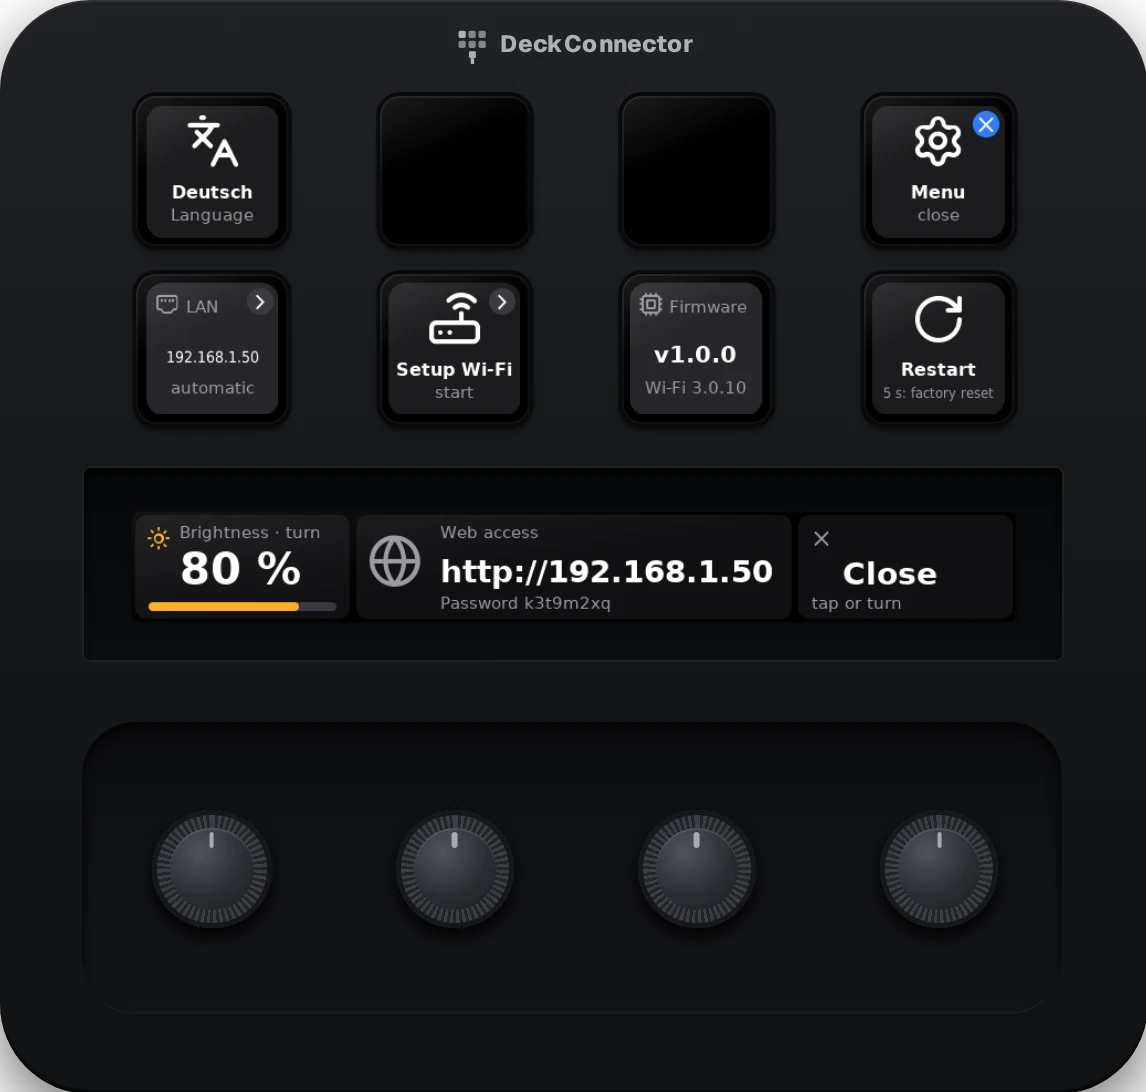
- Deutsch
- Switches the deck to German. In German it says English
- LAN
- Fixed or automatic address
- Setup Wi-Fi
- Starts the setup Wi-Fi
- Restart
- Tap twice: restart. Hold 5 s: factory reset
- Strip
- Brightness, turn dial 1, at least 20 % while the menu is open. Web address, password. Close